MiniWerks

Fine Handbuilt Models from around the World

Latest Models

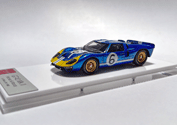
Ford GT40 Mk.II Holman & Moody 24H Le Mans 1966

Ford GT40 Mk.II Holman & Moody 24H Le Mans 1966

Last Two! Ford GT40 Mk.II Holman & Moody 24H Le Mans 1966 Lucien Bianchi/Mario Andretti. Brand New.

» See more...

Welcome to MiniWerks Online!

The focus here is representing high–end 1/43 scale handbuilt models from the World’s top brands, as well as pieces from internationally renowned independent builders.

Mike McCormick signature

MiniWerks Forum
Home | Profile | Register | Active Topics | Members | Search | FAQ
Username:
Password:
Save Password
 All Forums
 General
 1/43 scale Handbuilt Models
 Next Project by Jean-Paul Magnette!
 New Topic  Reply to Topic
 Printer Friendly
Previous Page
Author Previous Topic Topic Next Topic
Page: of 4

David

109 Posts

Posted - 12/26/2011 :  03:09:01  Show Profile  Reply with Quote
The final effect is much more convincing.
Go to Top of Page

PeterW

USA
1216 Posts

Posted - 12/26/2011 :  08:04:24  Show Profile  Visit PeterW's Homepage  Reply with Quote
JPM is very good at building these little beauties in the AMR tradition of building. As has been said in this thread it takes a talented builder to keep it simple and elegant.
Go to Top of Page

Ferrarinut

USA
1489 Posts

Posted - 12/29/2011 :  12:03:53  Show Profile  Reply with Quote
In this step, we have to prepare the plexi covers for the front lights. First to cut them with scissors from the vac-form part and then to smooth the edges with sanding paper.
Go to Top of Page

Ferrarinut

USA
1489 Posts

Posted - 12/29/2011 :  12:05:10  Show Profile  Reply with Quote
Once they adapt perfectly to their place, they are held with tape; we can glue them now with a small thread of 2 components epoxy glue applied with a little stick, the excess glue is wiped away with Q-tip.
On those cars the plexis were secured with black tape, this is perfectly reproduced using the decal provided in the kit.
Go to Top of Page

Ferrarinut

USA
1489 Posts

Posted - 12/29/2011 :  12:06:10  Show Profile  Reply with Quote
Last step of the building is to put all the small accessories on the body, note the 3 parts for each rectangular light and the handles of the hood with their tiny washers.
Go to Top of Page

Ferrarinut

USA
1489 Posts

Posted - 12/29/2011 :  12:07:31  Show Profile  Reply with Quote
The rear part now , the fuel cap is particularly accurate with one white-metal and one photo-etched part. We’ll finish with the exhaust pipes and the hooks for the lifting jack.
Hope you did enjoy this building process and wish all the best to all forum visitors for 2012!
Last word to thank Mike Craig for giving us the opportunity to work on such wonderful kits, can’t wait to see his future creations!
Go to Top of Page

Ferrarinut

USA
1489 Posts

Posted - 12/29/2011 :  12:08:30  Show Profile  Reply with Quote


Go to Top of Page

126ck

Germany
26 Posts

Posted - 12/31/2011 :  04:36:10  Show Profile  Reply with Quote
i enjoyed every single picture ! happy 2012 to all forum members !

regards ! :-)
Go to Top of Page
Page: of 4 Previous Topic Topic Next Topic  
Previous Page
 New Topic  Reply to Topic
 Printer Friendly
Jump To:
MiniWerks :: Fine Handbuilt Models from around the World :: Contact MiniWerks :: MiniWerks on eBay © 2014 Mike McCormick. All rights reserved   Go To Top Of Page
 
Snitz Forums 2000